How to Enable XMP or EXPO and Check Your RAM Runs at Full Speed
Many gaming PCs ship with fast memory that quietly runs at a much slower default speed. Turning on the right memory profile in the BIOS takes a couple of minutes and costs nothing. This guide shows you how to do it safely, how to confirm it worked, and what to try if the PC refuses to boot afterward.
Why Your RAM May Be Running Slower Than the Box Says
Memory modules start up using standard default settings defined by an industry body. Those defaults are conservative so that any module works in any compatible board. The faster speed printed on your kit is a tested, manufacturer-approved setting that sits in a small profile stored on the module. Until you enable that profile in the BIOS, the system keeps using the slow default. It is one of the most common reasons a new build underperforms without anyone noticing.
XMP, EXPO and DOCP: What Are They?
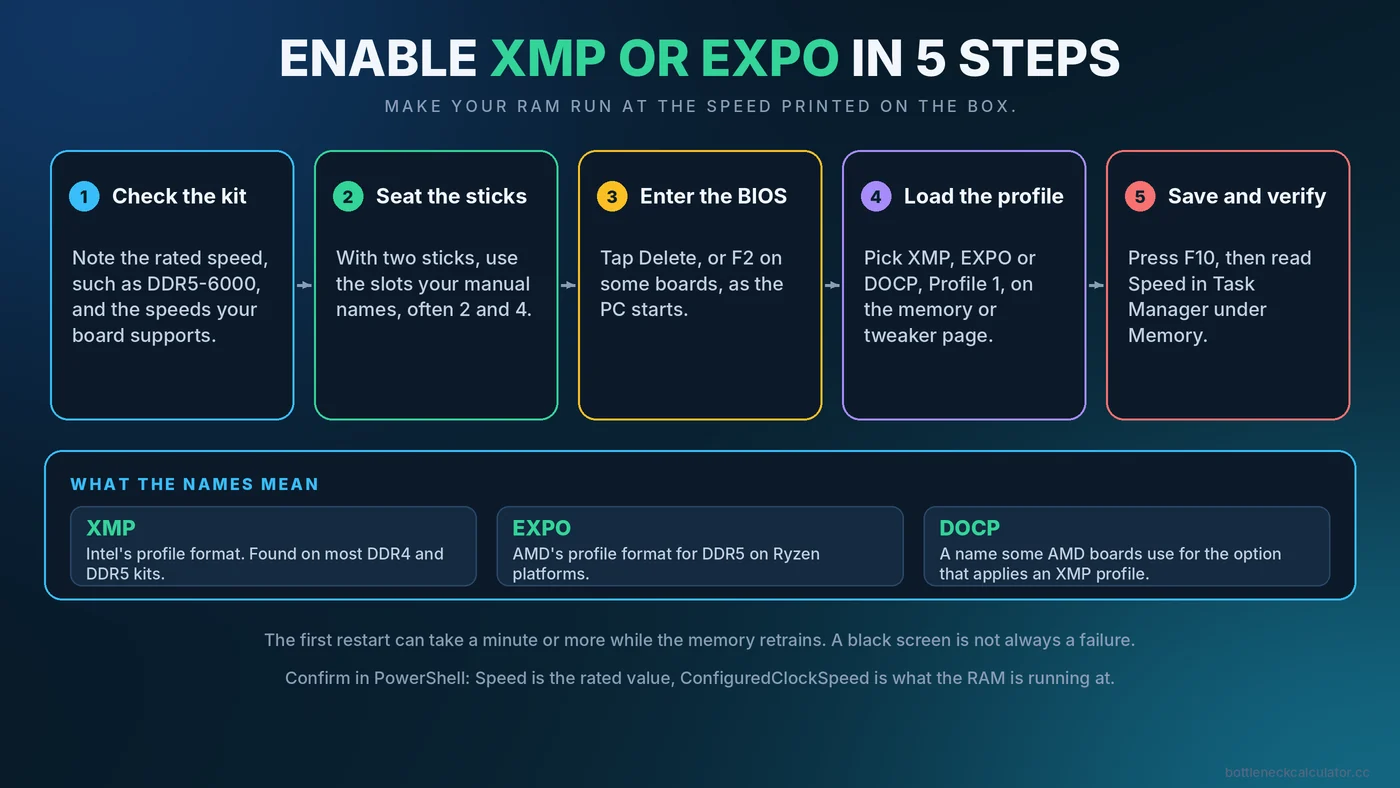
- XMP (Extreme Memory Profile) is the profile format created by Intel. Most DDR4 and DDR5 kits carry one, and many AMD boards can use it as well.
- EXPO (Extended Profiles for Overclocking) is AMD's profile format for DDR5 on Ryzen platforms.
- DOCP is the name some AMD board makers use for the option that applies an XMP profile on their boards. You may also see similar vendor names such as A-XMP or Memory Profile.
The names differ, but the idea is identical: load the faster settings stored on your RAM. Your BIOS shows whichever name your board maker chose.
Before You Start: A Short Checklist
- Know your kit's rated speed. Look at the label on the stick or the product page, for example DDR5-6000.
- Check the board and CPU can support it. Boards and processors list the memory speeds they support. Higher profiles may need a newer BIOS.
- Install the sticks in the correct slots. With two sticks on a four-slot board, the manual usually tells you to use the second and fourth slots counting from the CPU. Getting this wrong can leave you in single channel or limit speed.
- Update the BIOS if you are on an old version. Follow your motherboard maker's instructions exactly and never interrupt a BIOS update.
- Note your current settings. Write down or photograph the memory page before you change anything.
Step by Step: Turn On the Memory Profile
- Restart and enter the BIOS. Tap the Delete key repeatedly as the PC starts. On some systems it is F2. The boot screen often shows the right key.
- Find the memory settings. They live under tabs with names such as Tweaker, Extreme Tweaker, AI Tweaker, OC, Overclocking or Advanced. Some boards also show a profile option on the home screen.
- Choose the profile. Select the XMP, EXPO or DOCP setting and pick Profile 1 unless the kit documentation says otherwise. Some kits offer a second profile with different speed or voltage.
- Review what changed. The speed, timings and voltage fields should now match your kit's label.
- Save and exit. Press F10 and confirm. The PC restarts and applies the new settings.
The first restart after enabling a profile can take noticeably longer than usual, especially with DDR5, because the system retrains the memory. A black screen for a minute or more can be normal. Wait before assuming something is wrong.
How to Verify the Speed in Windows
Task Manager
Press Ctrl, Shift and Escape, open the Performance tab and click Memory. The Speed value shows what your RAM is running at, and the Slots used line shows how many sticks are detected. The number is reported in MHz even though it reflects the data rate, so a DDR5-6000 kit may display as 6000.
PowerShell
For a more precise check, open PowerShell and run this command:
Get-CimInstance Win32_PhysicalMemory | Select-Object Manufacturer, PartNumber, Speed, ConfiguredClockSpeed
Speed is the rated value of the module, and ConfiguredClockSpeed is what it is actually running at. If the two match, your profile is active.
CPU-Z
On the Memory tab, the DRAM Frequency is half the data rate, so 3000 means DDR-6000. The Channels field should say Dual if you have two sticks installed correctly.
What If the PC Will Not Boot After Enabling the Profile?
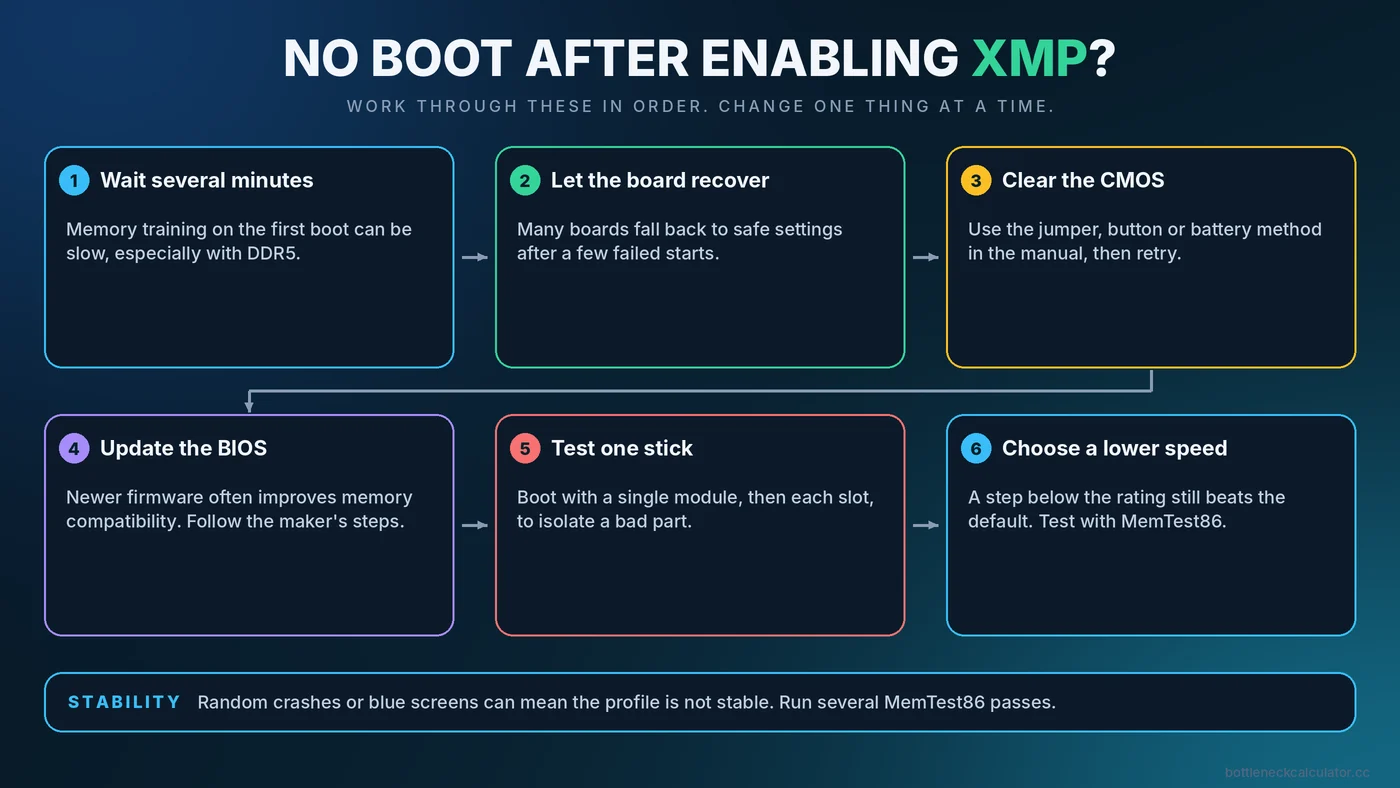
- Wait several minutes. Memory training can be slow the first time.
- Let the board recover. Many boards automatically fall back to safe settings after a few failed attempts.
- Clear the CMOS. Use the CMOS jumper or button on the board, or follow the manual's battery method, then enter the BIOS and try again.
- Update the BIOS. Memory compatibility improves over time, and a newer release often fixes profile problems.
- Try one stick at a time. This helps you find out whether one module or one slot is the problem.
- Choose a lower speed. If the full profile will not hold, set a lower speed manually. Running a notch below the rating still beats the default.
How to Check That It Is Stable
A profile can boot and still be unstable. Warning signs are random crashes, blue screens, games closing without an error, or corrupted files. To test properly, run a dedicated memory tester such as MemTest86 from a bootable USB drive and let it complete several passes. Windows also includes a basic Memory Diagnostic tool, which is quicker but less thorough. If errors appear, lower the speed, reseat the sticks and check for BIOS updates.
Common Reasons the Full Speed Does Not Apply
- Four sticks instead of two. Filling every slot puts more load on the memory controller, so boards often settle at a lower speed than a two-stick setup.
- Mismatched kits. Sticks bought separately may not share a compatible profile.
- The CPU or board limit. The processor's memory controller may not handle the kit's top speed at all.
- Single channel. One stick, or two in the wrong slots, halves your memory width.
- An outdated BIOS. Newer firmware often adds support for faster kits.
Is It Safe, and Does It Affect Warranty?
These profiles are created by the memory maker and tested on their own hardware, so they are a normal, widely used feature. Technically, they run the memory above the industry default, and processor makers can word their warranty terms around memory beyond official specifications. Read your CPU and board warranty documents if that matters to you. Stay with the profile your kit provides and avoid manually raising voltage unless you know exactly what you are doing.
How Much Will It Help?
That depends on your hardware and what the game is limited by. In GPU-limited situations you may see little change. In CPU-limited ones, the difference can be more visible, particularly in 1% lows. Our article on whether RAM speed affects FPS explains when to expect a gain. Even when the change is small, running your memory at its rated speed is part of a properly configured system, and it takes only minutes. If your PC still feels slow after this step, work through the PC upgrade checklist and the RAM bottleneck guide.
Conclusion
Enabling XMP, EXPO or DOCP is one of the simplest ways to get what you paid for. Check your kit's rated speed, install the sticks correctly, load the profile, confirm the result in Windows and test for stability. Then see how your CPU and GPU balance with the free Bottleneck Calculator.
Frequently Asked Questions
Should I enable XMP or EXPO?
For most gaming PCs, yes. It makes your memory run at the speed it was sold at. Make sure your board and CPU support the kit, and test stability afterward.
Is XMP the same as EXPO?
They do the same job with different profile formats. XMP comes from Intel, and EXPO is AMD's format for DDR5. Many boards can use either, and some AMD boards call the option DOCP.
Why does my RAM show a lower speed in Task Manager?
Usually because the memory profile is not enabled, so it is running at the default speed. It can also happen when four sticks are installed, the kits are mismatched, or the CPU cannot support the rated speed.
Can enabling XMP damage my PC?
The profile is a manufacturer-tested setting, so it is widely used. It does run the memory beyond default specifications, so check your warranty terms, and avoid manually raising voltage beyond what your kit lists.
How do I know if my RAM is in dual channel?
Open CPU-Z and look at the Channels field on the Memory tab, which should say Dual. Task Manager also shows how many slots are used. Check your manual for the slots to use with two sticks.